copyright : Dieter Bedenknecht NZ.-06 2000 
Glass cutting is the basis of your project and it is important that
this is done correctely.The better you cut the easier and better the
glass pieces will fit together and the narrower the solder lines will
be.I strongly suggest that before you start with any project that
together with the video you practice cutting on 2 and 3mm clear glass,
the various difficulty cuts. 1) There are many different coloured glasses available and most are
3 to 4mm thick and have various textures.
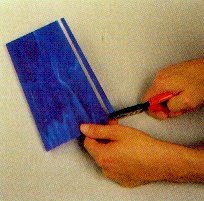
Allways cut on the flat surfaced or shinier side of the glass.
2)Unless you are cutting a straight line, allways start at the bottom
of the glass and cut upwards following your pattern lines. 3)The problem some people may have when cutting is when attempting
a cut, there is no cut line to see or the cut line is thinner towards
the end of the cut. Hints:
a)You may have to apply a little more pressure and continue with even
pressure right to the end of the cut.
b)Don't stop in the middle of a cut, if you do start a new cut.Never
go over the same cut twice as this will eventually damage your glasscutter
and the glass wont break proparly anyway.
c)Also check that you are holding the glasscutter in the right position,
which is like you would hold a pen, for easy guidance across the glass.
d)Take a break if you feel your wrist is getting tired.Sometimes taking
a break and going back later with renewed energy helps.
Difficult cuts:
Certain shapes are difficult or impossible to cut in glass. Our control
over how glass breaks is limited. While a pattern may call for a cut
to curve or stop at a certain point, the tension within the glass
may cause the break to run straight or through the entire glass piece.
4)So when you have difficult cuts to do, like sharp inside or outside
curves, remember to cut in steps, allways cutting a bit at the time
until you get to your desired cut.With any shape of glass piece allways
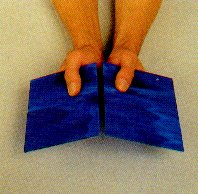
try and cut in the easiest way possible. Breaking the glass : 5)When breaking a bigger glass piece with your hands:
Hold on tightly to the glass piece with both hands, the cut line being
in the middle, thumb on top of the glass the rest of your fingers
underneath, now break the glass by twisting your hands slightly outwards
and down. 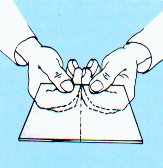
|